![smartbarrel-logo-1.png]](https://ask.smartbarrel.io/hs-fs/hubfs/smartbarrel-logo-1.png?height=39&name=smartbarrel-logo-1.png)
Apply color-coded rule to specific time bands before or after the shift start or end each with its own rounding behavior and optional SMS alert. Specify different rules for different days of the week.
Things to Consider
Time Rules are configured in two places:
-
Company Settings → General (define tags)
- Require Admin role
-
Project → Working Shifts → Configure Time Rules (apply per day)
- Require Manage Working Shift (Project Settings) permission
- Round-Up Rules and Time Rules cannot be active on the same shift at the same time.
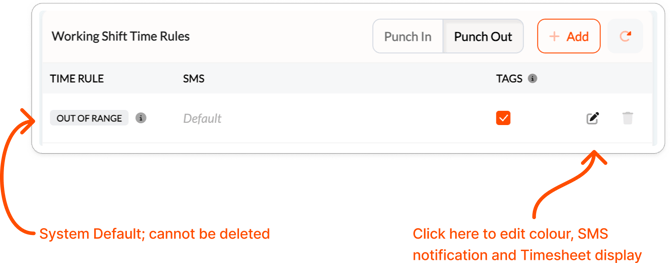
- The Out of Range tag is system-defined and cannot be deleted, though its SMS text and timesheet display can be edited.
Step by Step Instructions
Part 1 — Set Up Company-Level Time Rule Tags (Admin Only)
Step 1. Go to Company Settings → General.
Locate the Working Shift Time Rules section in the two-column layout next to Tardiness Reasons.
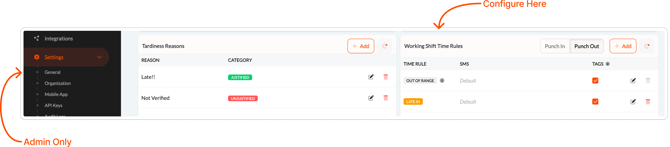
Step 2. Click + Add to create a new tag.
The tag editor opens with the following fields:
- Punch Type — Select whether this tag applies to Punch In or Punch Out. This cannot be changed if the rule is already in use on a shift.
- Tag Name — The label displayed on the Timesheet and in SMS messages.
- Color — Choose from.
- Custom SMS (optional) — Write a message using variables such as worker name, project, working shift, and punch time. The editor shows an approximate character count; stay under 160 characters when possible (a hint, not a hard limit, since variable expansion changes the final length).
- Display on Timesheet — Check this box to show the tag in the Tag column on the Timesheet for punches that match this rule.
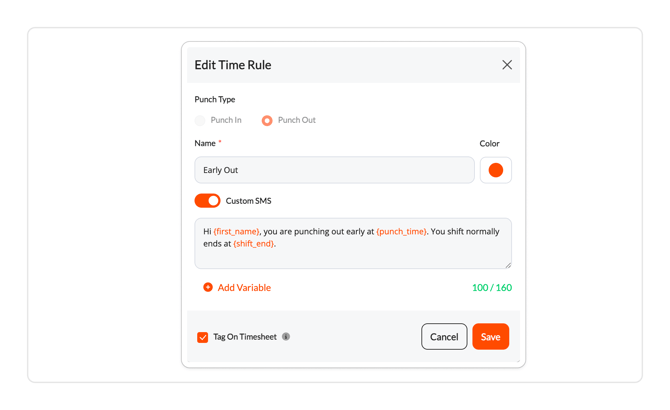 Step 3. Click Save. The tag is now available in the dropdown on all working shifts.
Part 2 — The Out of Range Tag
The Out of Range tag is a system default that cannot be deleted. It automatically applies to any punch that falls outside every configured Time Rule on a shift with Track Out of Range enabled.
- Its color, custom SMS, and Timesheet display setting can be edited like any other tag.
Part 3 — Apply Time Rules to a Working Shift (Per Day)
Step 1. From the project, open the hamburger menu and select Working Shifts.
Step 2. Open the shift you want to configure and go to Edit Shift.
Step 3. Under Shift Schedule, you have the option to configure Time Rules per weekday. By default Time Rules will be inactive.
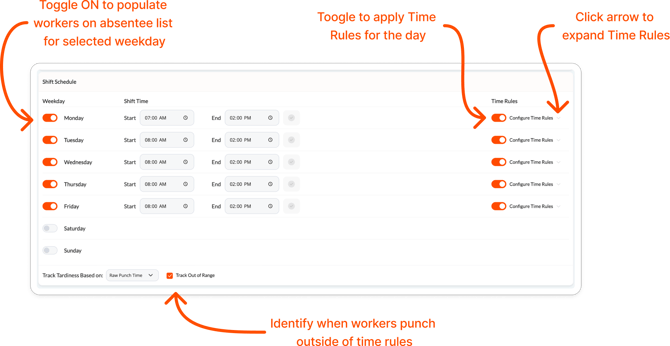
Step 4. Configure Time Rules by clicking on the arrow to expand each row.
- Punch In Rules — Bands defined as before or after shift start time.
- Punch Out Rules — Bands defined as before or after shift end time.
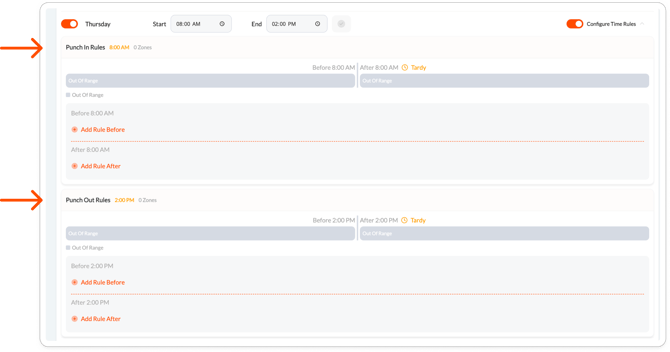
Add a rule line by clicking + Add Rule within the section. For each rule, set:
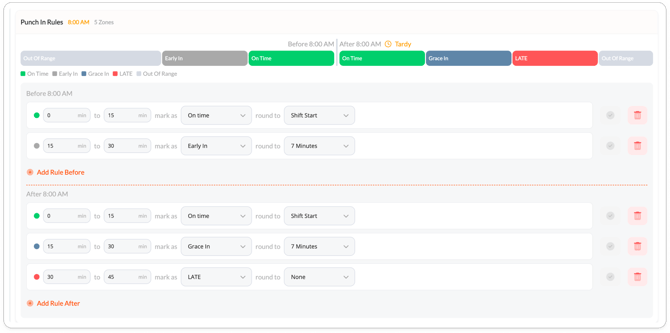
- Tag — Select from the company-defined tags for that punch type, or choose No Tag (shown in grey in the preview).
- Time Range — Define the window (e.g., 0–15 minutes before shift start).
- Rounding — Choose: Shift Start, Shift End, 7 minutes, 15 minutes, or None.
Step 5. Click the green check icon on the rule line. Rules save individually, separate from the schedule's auto-save.
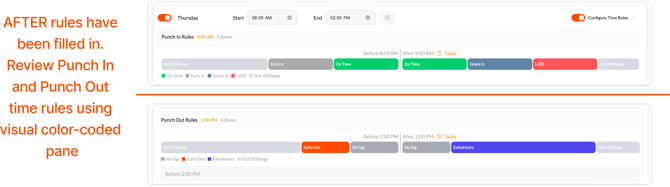
Step 6. Verify both Punch In and Punch Out color preview pane below each day's rules for quick visual review.
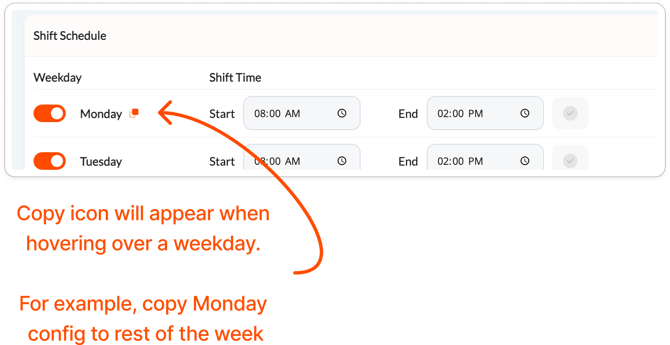
Step 7. To copy Monday's rules to every other day, click the copy icon next to Monday and confirm. This overwrites any rules already configured on other days. You can use any day to copy from.
Part 4 — Enable Out of Range Tracking
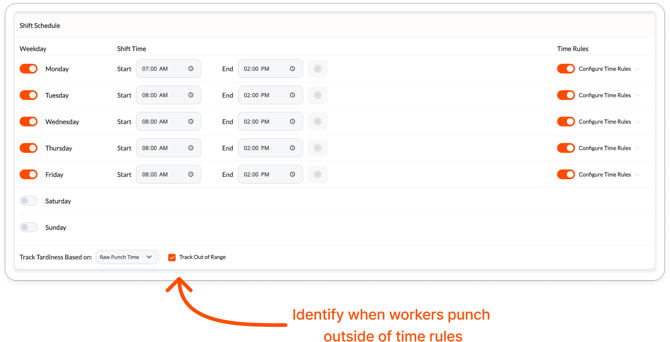
Step 1. On the shift edit page, check the Track Out of Range checkbox.
-
This checkbox is only visible if at least one day on the shift has Configure Time Rules ON.
-
When enabled, any punch that doesn't match a configured rule and falls outside the shift window is automatically tagged with the Out of Range tag.
-
⚠️ Note: Tracking, custom SMS, and Timesheet tagging for Out of Range are independent. You can enable any combination — for example, send an SMS without showing the tag on the Timesheet.
Part 5 - Importing Time Rules
Use the new Import Settings to copy working shift settings from another. This also works across projects.
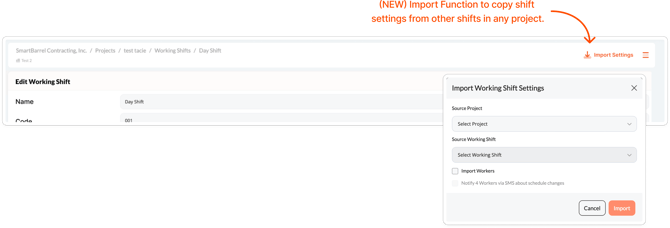
💡 Use a template shift. Configure all your Time Rules on a single "template" shift, then use the Import button on any other shift to copy that configuration in one click — without affecting existing workers' punches.
Part 6 - Timesheet Tags and filters
Viewing Tags on the Timesheet
Step 1. Open the project and navigate to the Timesheet.
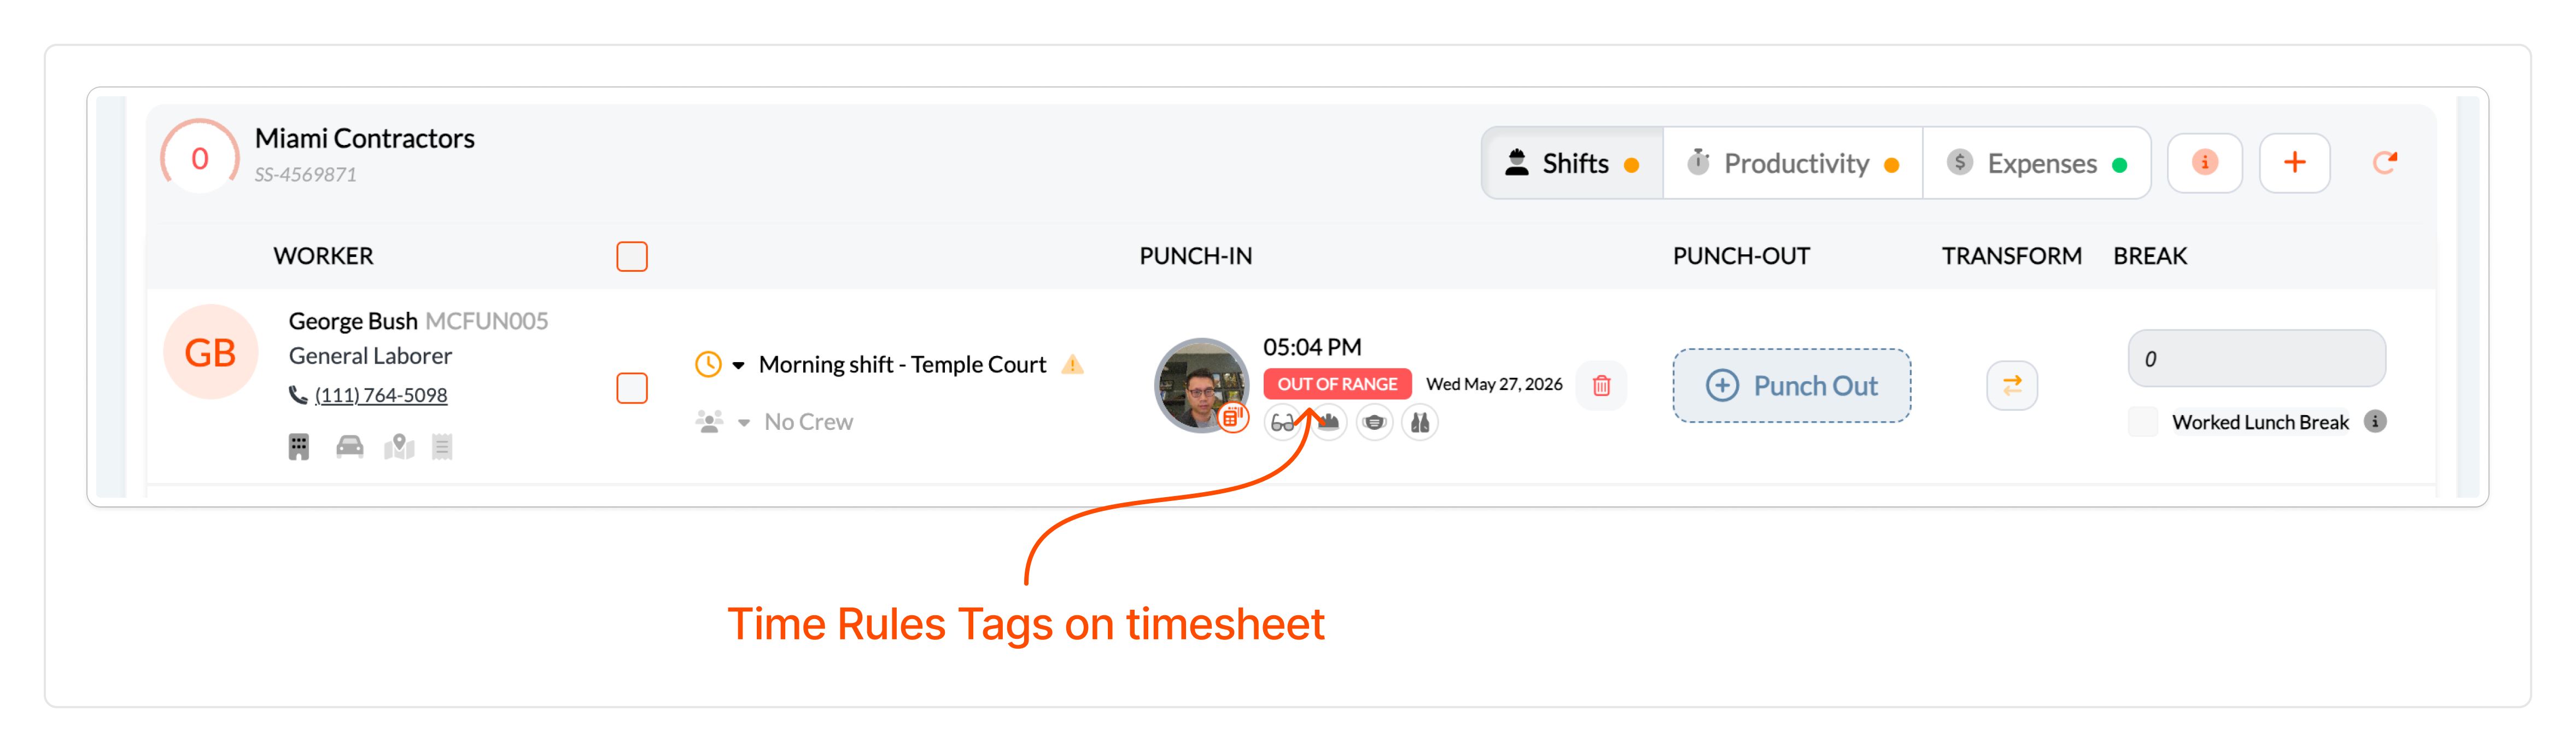
Step 2. Each punch that has been tagged displays:
- A colored chip matching the Time Rule's assigned color.
- The tag name as defined in Company Settings.
Filtering by Tag
Step 1. Open the Filter panel on the Timesheet (filter icon in the top toolbar).
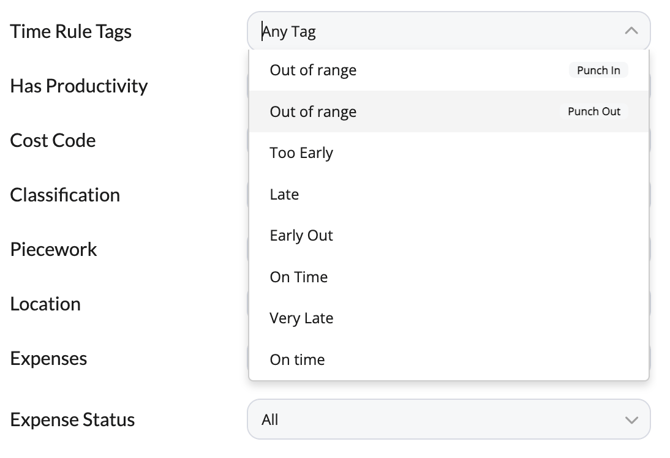
Step 2. Find to Time Rules Tags multi-select filter.
Step 3. Select all tags you want to show in current view and hide the rest.
Important Notes
-
Round-Up Rules and Time Rules cannot run together. Turning on Time Rules for any day disables Round-Up Rules for the entire shift. Turning Time Rules off everywhere re-enables them. Saved Round-Up Rules are never deleted.
-
Editing a company tag propagates everywhere. Changing a tag's name, color, SMS, or Timesheet display in Company Settings updates it across every shift that uses it.
Why This Matters
- Customers with staggered crews, grace periods, or weekend-only schedules can define rules per day instead of applying a single global round-up.
- Out-of-range tracking surfaces unauthorized punches automatically — no manual timesheet sweep required.
- SMS alerts sent at punch time give workers real-time feedback without supervisor intervention.