Highlights:
Travel shifts records the time a worker spends travelling between jobsites. This ensures the workers are paid for their entire workday, with no gaps in pay for time spent travelling and not actively clocked into a project.
Things to Consider:
-
Settings are enabled per project:
Travel settings are configured at the project level, and thresholds can be defined to control when travel shifts are created, These thresholds are based on distance and travel time.
-
Separate travel shifts:
Travel time is logged as a separate travel shift on the destination project, distinct from the worker's regular shift. This provides a clear record of when a worker leaves one location and arrives at another.
Steps to Enable Auto Travel Shift Settings
Step 1: Configure Punch Settings
- From Project Settings, scroll down to the Punch Settings section.
- Toggle Auto Travel ON
- Customize the Distance and Travel Time thresholds as needed.
⚠️ Important:
-
If the actual distance or travel time falls outside the selected thresholds, a travel shift will not be recorded.

Step 2: Auto Travel Shifts Are Enabled
Once enabled, the next time a worker punches in, the system will automatically record travel shifts when:
- A workers leaves one jobsite, and
- Arrives at the next project location (in the same day)
Example 1 - Punch into Project A (No Punch Out) and Travel to Project B
A driver begins their shift by punching in at Project A.
The worker then leaves Project A without punching out and travels to Project B, where they punch in. Project B has Auto Travel Enabled.
Upon punching into Project B, the system automatically:
- Creates a travel shift equal to the calculated drive time between Project A and Project B using Google Maps, and
- Generates an automatic punch out for project A (identified by a robot icon), timestamped as the Project B punch-in time minus the calculated driving time.

Example 2 - Punch IN & OUT of Project A and Travel to Project B
A driver begins their shift by punching in at Project A and punches out before travelling to Project B. Project B has Auto Travel Enabled.
When the driver punches in at Project B, the system automatically creates a travel shift equal to the time between punch out at Project A and the punch in at Project B.

How to Manually Create a Travel Shift
This option is useful when a worker travels to multiple jobsites and the travel time was not automatically recorded. users with the appropriate permissions can manually add a travel shift to ensure the worker is paid correctly.
Step 1: Add a Travel Entry
- Navigate to the Project Timesheets section.
- Click the (+) icon and select Add Travel Entry.

Step 2: Enter Travel Details
- Select the Worker.
- Choose the Shift Date.
- Enter Travel Time.
- Select an Edit Reason.
- Click Create.
💡 Tip: The Reason field is mandatory and must be completed before a travel shift can be created.

Step 3: Review and Approve
Review the travel shift details and approve the entry as required.

Edit, Delete, and Restore a Travel Shift
This feature allows users to edit or adjust travel time entries, as well as delete or restore previously deleted travel shifts.
Edit a Travel Shift
- Click directly on the travel shift entry you want to update.
- Make the necessary changes and add a reason for the edit.
- Save your changes.
- Note: A reason is required when editing a travel shift.


Delete or Restore a Travel Shift
- Click the three-dots (...) menu at the end of the travel shift row.
- Select Delete to remove the travel shift, or Restore to reinstate a previously deleted entry.
Once deleted, the travel shift will be highlighted in red, making is easy to identify.

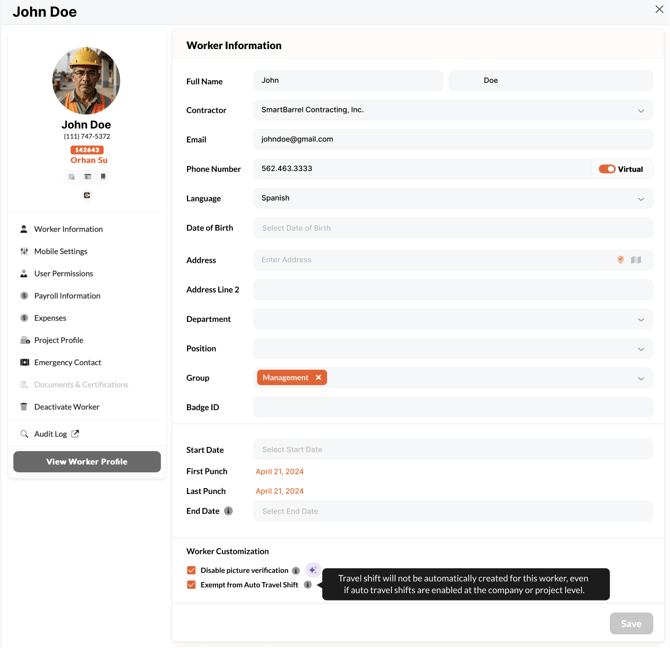
Exempting a worker from Auto Travel Shifts
If required, an individual worker can be exempted from Auto-Travel shifts by activating the "Exempt from Auto Travel Shift" in their worker profile.
Videos
Steps to Enable Travel Shift Settings
How to Create a Travel Shift
Edit, delete and restore a travel shift